Wednesday, December 29, 2010

Chestnuts for Christmas

The soup was divine. So delicious that I forgot to take a picture of it before polishing it off.
This picture is credited to the Vegetarian Times.


Christmas morning I found myself opening a crudely taped together black paper bag. It was strangely lumpy and heavy. Ruddy brown chestnuts tumbled onto my lap and I distinctly remembered the little argument Happy Boy and I had a few days prior in the supplement aisle of Rainbow over a 15 oz. jar of peeled chestnuts. Even though they were $11.50, I wanted to buy them to make a chestnut, mushroom, and Marsala soup. Happy Boy argued that they were too expensive and promised that it would be cheaper if he were to buy me raw chestnuts to cook. I allowed myself to be persuaded by this logic and did not buy the exorbitantly priced jar of chestnuts.

Today I boiled and peeled those chestnuts to ready them for soup. My hands are red and my fingertips tender from burns. Having never had luck with roasting chestnuts the way they do in New York--mine always turn out chalky and both undercooked and overcooked at the same time (Yes, that is possible.)--I boiled them for 20 minutes after scoring the flat sides with a little X. This was supposed to help in the peeling process. I suppose it did help a little, but A Process it was. I tried peeling them, but usually the scabby brown skin under the shell stayed on and so I had to peel the chestnut yet again. Not efficient, to my mind.


After much experimenting, I settled on this method: I cut them in half and then took a little oval teaspoon and scooped out the center. This proved to be very messy (However, it's all messy, no matter what method), but at least I could wear an oven mitt while I used the other hand to scoop without fear of stabbing myself in the hand. Though I soon wearied of slipping the oven mitt on and off with every nut and just steeled my nerves against the searing pain of tightly gripped hot chestnuts. Hence, the tender red hands. Couldn't I just wait till they cooled off, you ask? No. You can't or the nut hardens back up and sticks to its shell just as stubbornly had you not boiled it. I should point out that boiling chestnuts for longer than 5 minutes will cook the nutmeat, making it fall apart when peeled. This is fine if you plan to puree the soup as I do.

So, if and when you decide to ever make this delicious soup, ask yourself, as I did, is $11.50 too much for a jar of whole peeled chestnuts (or shrink-wrapped as I've also seen them)? The conclusion I came to the difficult way: Absolutely not. Worth every penny!

I should also add that Happy Boy intended to include a coupon for chestnut peeling with the present, but, sadly, it was forgotten in the hubbub. Oh, well. E for effort.


The soup was divine. So delicious in fact that I forgot to take a picture of it. It was rich and creamy. Delicate and complex. A description owing more to the chestnut than the butter and cream (though they never hurt.) A festive appetizer or a light lunch served with crusty bread.


This recipe has been in my stack of "recipes to try" for over two years. I'm glad I finally made it and will definitely make it again soon, the easy way.


Classic Chestnut Soup with Marsala Mushrooms


Serves 8


Soup


3 T butter

1 medium onion, diced

1 celery stalk, diced

1 bay leaf

1 T chopped fresh thyme

1/8 tsp ground allspice

1 15-oz. jar cooked, peeled whole chestnuts, chopped

4 C vegetable or chicken broth

2 T Marsala wine

1/3 C heavy cream

2 T finely chopped fresh thyme leaves for garnish


Mushrooms


1 T butter

1 clove garlic, minced
8 oz. button or cremini mushrooms, stemmed and sliced
2-3 T Marsala wine


1. To make soup: Melt butter in large pot over medium heat. Add onion, celery, bay leaf, thyme, and allspice, and cook 5-7 minutes, or until onion is translucent. Add chestnuts, broth, and 2 cups of water, and bring to a boil. Reduce heat to medium-low, cover, and simmer 20-25 minutes, or until chestnuts are very soft. Remove bay leaf.


2. Puree soup in batches in blender until smooth. Return to pot, and stir in Marsala wine and cream.


3. To make Mushrooms: Heat butter and garlic over medium heat. Add mushrooms, and cook 4-5 minutes or until mushrooms are soft. Add Marsala wine, and cook 1 minute more, or until most of liquid is evaporated.


4. Season soup with salt and pepper, and ladle into bowls. Garnish servings with mushrooms and fresh thyme.


P.S. I HAVE NO IDEA HOW TO CORRECT THE FORMATTING ERRORS IN THIS POST. GRRR!

Monday, December 6, 2010

Grand Central Tomato Relish


Here I am again, craving food from Portland. I've been able to satiate the desire for this condiment maybe twice a year. Whenever I visit, I sidle up to the counter of my former employer and gorge myself on Bacon Egg Bolos. The best part of those sandwiches is not the farm fresh egg cooked to perfection, not the pepper bacon, not the crusty bolo roll, but the zingy tomato relish. For those of you in Portland, you have only to stroll down to your local Grand Central Bakery to partake, while the rest of us have been left to trawl the internet in hopes of replicating the tangy dance of tomato relish on our tongues.

I'll wager a guess that the recipe I found was probably posted by an old Grand Central commissary employee, as it is pretty right on in taste. Though maybe it was just re-posted from the cookbook they published a few years ago. I've no idea. But thank you, whoever you are, for posting this lovely recipe for tomato relish.


With the end of tomato season looming, I squirreled away some Happy Boy San Marzano tomatoes to make a batch of tomato relish. It jars up easily and keeps in the freezer for many months and in the fridge for many weeks, so that when your lonely winter taste buds crave a dose of acidy, summer warmth, you can just reach into the fridge and spoon some up.

Enjoy!

Grand Central Tomato Relish

1/4 C sliced sun-dried tomatoes (dry-packed)
1/4 C olive oil
1 large white onion, diced
1 large leek, washed and diced
1 28 oz can diced tomatoes, drained, juices reserved
2 T firmly packed brown sugar
3 T balsamic vinegar
1 T salt


In a small bowl, cover sun-dried tomatoes with boiling water. Let sit about 10 minutes. Drain and reserve liquid. Puree in food processor, adding a little of the soaking liquid if the puree is too stiff. Set aside.

Heat olive oil in a large skillet over medium-high heat. Add onions and caramelize, about ten minutes. Lower heat and add leeks, cooking until tender, about 6-8 minutes more.
Combine reserved juice from canned tomatoes with puree. Add to the onion and leek mixture in the pan and turn up the heat, stirring until the liquid evaporates.

Add the brown sugar, balsamic vinegar, and salt. Reduce heat to low and cook until sugar and salt dissolve.

Remove from heat, cool, and stir in uncooked diced tomatoes. Adjust seasoning to taste. Store in fridge up to 4 weeks or freeze for up to 6 months.

Tuesday, October 5, 2010

"Gazpacho...mmm...que rico!"


Happy Boy and I have been working our way through the Pedro Almodovar box set. He's one of my favorite directors and has created some of the most memorable characters and films. One of my favorite films is Woman on the Verge of a Nervous Breakdown. It's a comedy with Carmen Maura and Antonio Banderas, involving chance coincidences, a crazy ex-wife, a mattress on fire, a friend running from a one-night stand with a terrorist, and a blender of barbituate-spiked gazpacho. Everyone has a little taste by the end.
One of my other favorite Almodovar films is Broken Embraces with Penelope Cruz and Lluis Homar Toboso, another film that involves spiked gazpacho. This time Almodovar cleverly references his first Oscar-nominated film, Woman on the Verge, by going behind the scenes, including the drama behind its creation. It's a beautiful movie about love and creation defying obstacles. Also the "scene" from Woman on the Verge, is totally different and totally hilarious.

It may be cold enough in Oakland to curl up with these films, but out in Chowchilla it is still hot and, with all that sun, the Happy Boy tomato farms will be going strong, possibly until late November! Everything rides on that first frost or cold snap. As soon as that happens, it's mush-city and tomatoes will be gone, gone, gone. So get 'em while they last.

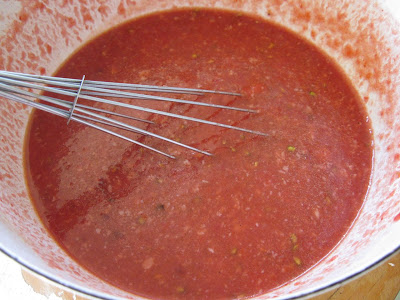
A delicious version of gazpacho (barbituates optional) is the Alice Waters recipe from The Art of Simple Food. When I first read it through, I thought only someone as crazy and purist as Alice Waters would grate tomatoes and pound garlic and ancho chile into a paste with a mortar and pestle. So I made a different version. One that was more salsa-esque. I don't recommend it. Unless you have a bag of corn chips and a taste for bland salsa, don't do it. I recommend you be crazy and purist instead. Turns out it's not that hard (though I cheated and used the grater disc on my cuisanart)! Go the distance and try this recipe of Alice's. It's to die for. I think Almodovar and Carmen would agree: Que rico!

Gazpacho
Yield ~3 quarts; 6-8 servings

Soak in a bowl of hot water for 15 minutes:
1 dried ancho chile
Drain and crush to a paste with a medium-size mortar and pestle. Remove and set aside.
In another bowl, soak in cold water for 2 minutes:
2 cups crustless cubes of day-old country-style white bread
Drain and squeeze out the excess water.
In the mortar and pestle, pound together into a paste:
2 garlic cloves
A pinch of salt
Add the soaked bread, pound until smooth, and set aside.
Cut in half horizontally:
5 pounds ripe tomatoes
Over a bowl, grate the cut sides of the tomatoes on the medium holes of a box grater until only the skin is left. Discard the skins. Pass the pulp through a strainer to remove seeds, if you like.

Stir the chile puree and the bread paste into the tomato pulp in a large bowl. Add:
1/4 C extra-virgin olive oil
Salt
Refrigerate until well chilled. Taste for seasoning before serving and adjust as needed.

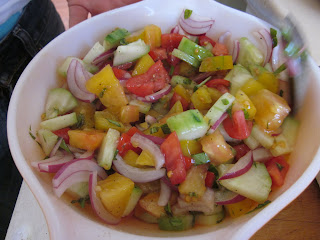
Make a relish to garnish the soup. It is also delicious without the relish.


Mix together:
1/2 pound cherry tomatoes, halved
1 cucumber, peeled and diced
1 yellow pepper, seeded and diced
1/2 red onion, diced
A handful each of chopped chervil and basil
2 T red wine vinegar
1/4 C extra-virgin olive oil
Salt
Fresh ground black pepper

Optional: Add a few shrimp or other fish or shellfish to the soup for a meal. Yum!


Thursday, September 16, 2010

Peach Chutney with Pork Chops

Sorry, gentle readers, for leaving you in the lurch. I had every intention of sharing a recipe I concocted last week involving orzo, piel de sapo melon, prosciutto, basil, feta, and shallots. Sadly, it was just not good enough to blog about. The flavors were good, it was just the texture that was off. So it's back to the test kitchen with that one.

Autumn approaches fast. The squirrels are already burying their acorns in our garden and the colder nights have put me in a similar state of preparation. Happy Boy (thanks Aneesa!) and I spent much of our free time last weekend prepping for winter: peeling tomatoes to freeze and making stock. And on Monday guess who stopped by with two boxes of meat--Happy Boy's dad! He brought us copius amounts of the following: pork chops, pancetta, bacon, salami, coppa, Italian sausage, skirt steak, flat iron steak, a tri-tip, pork tenderloin, Korean style short ribs, duck breast, and two whole chickens. Thank god C. lives downstairs so that he can keep some of the meat in his freezer because ours is full.

Watch out for the meat slides!


All this with flats of peaches and tomatoes still laying around. (It always seems to come back to the peaches doesn't it?) So I made a peach chutney to serve with barbequed pork chops. Making chutney isn't difficult and is actually a pretty quick process.


Fresh Peach Chutney

1/2 C cider vinegar
1/3 C white sugar
1 T molasses
1/2 C diced sweet red pepper
1 large shallot, diced, about 1/2 C
1 small jalapeno, seeded and diced
1/3 C white raisins
1 T chopped garlic
1 T grated ginger
1/2 tsp salt
1 1/2 lbs peaches, skinned and sliced into wedges

1. In a medium saucepan over medium heat bring vinegar, sugar, and molasses to a boil.

2. Add the diced pepper, shallot, jalapeno, raisins, garlic, ginger, and salt and simmer to reduce by half. Stir frequently. This takes about 10-20 minutes.


3. Add the peach slices and simmer an additional 5-10 minutes till tender and reduced.

N.B. The peaches will create a lot of juice as they cook down. You will need to be very gentle when stirring to reduce this added liquid. The peaches are fragile and you are at risk of making more of a jam than a chutney if you're too vigorous with your stirring.


4. Cool for 15 minutes.

Yield is 2 1/2 Cups. Enough to can or share with friends. This will keep in a sterilized jar in the refrigerator for up to 2 weeks.


Tuesday, September 7, 2010

Angel Food Cake

What's under there?

I don't know why, but I've always wanted a cake carrier. I've seen many different kinds. Some peppered with be-ribboned bouquets, some with flowers growing round the base, some with funfetti thrown across a garish background, some with stripes, some with plaid. Yes, plaid. And while the last two came the closest to being purchased, they just weren't good enough. I think I recognized that if I was actually going to plunk down the cash for such a frivolous purchase it had to be the
one. And then a few months ago at The Whistle Stop Antique Shoppe in Sunol, I saw the beauty above. Cut glass bottom with a clean, white enamel lid, chrome handle and sturdy sliding locks on the sides. It was love at first sight, but still I hemmed and hawed about whether or not to buy it. I tested its locks, turned it over and around, put it back in its place, and circled the shop trying to forget about it. After the third pass, I was still in love. We both knew what was happening here, so I brought it up to "Bob", the grizzled old lady who ran the shop and never looked back.

Yet it has listed in the cabinet with nary a cake to carry, until now. Thank you C. for turning 34 and giving me an excuse to bake you a cake and carry it to your house! Turns out the cake carrier has more than just quality and good looks going for it--it also hides what's within heightening the suspense.

So, what was within? YOU already know...

Angel Food Cake!

Thank you again, C., for sharing my love of Angel Food Cake. I love eating it. I love making it. I love how much others love it. To me Angel Food Cake is a perfect dessert. It's sweet, airy, and amazing on its own or paired with fruit, custard, lemon curd, whipped cream, or sour cream. I don't know if this an appropriate adjective to describe a cake, but it strikes me as very clean. I guess because of its lack of fat.

The recipe below is uber basic, but I have a few tips.
  • Room temperature eggs will give the best volume, which helps keep the cake light and airy even while you gently incorporate the dry ingredients
  • Make sure your pan and bowl are clean and dry. Any trace of oil or fat will cause your cake to deflate.
  • You're going to need a big mixing bowl, because those egg whites will triple in size. I promise you! Compare below:
    12 egg whites
12 egg whites beaten into submission
  • Gently fold in the dry ingredients. A little deflation when you fold in the dry ingredients is normal, but take care you don't overmix or you will end up with a tough cake. And no one wants that.

  • Clean any batter off the sides of the pan before baking or else your house will smell like burnt sugar.
  • It is important that the cake is allowed to cool upside down so that it doesn't decompress. If you don't have a fancy, cool pan like this (I didn't know what those annoying legs were for for the longest time), then balance it on the neck of a wine bottle.
I served C.'s cake with lemon curd folded into whipped cream and topped it with mascerated strawberries. YUM!


Classic Angel Food Cake Recipe

1 C cake flour
1 1/2 C white sugar
12 egg whites
1 1/2 tsp vanilla extract
1 1/2 tsps cream of tartar
1/2 tsp salt

1. Preheat oven to 375 degrees F. Be sure that your 10 inch tube pan is clean and dry. Sift together flour and 3/4 C sugar, set aside.
2. In a large bowl, whip egg whites with vanilla, cream of tartar, and salt to medium stiff peaks. Gradually add the remaining sugar while continuing to whip to stiff peaks. When at maximum volume, fold in the sifted ingredients, one third at a time. Do not overmix. Put the batter into the tube pan.
3. Bake for 40 to 45 minutes, or until the cake springs bake when touched. Check on it frequently as it can burn quickly. Balance the pan upside down on top of a bottle to prevent decompression while cooling. When cool, run a knife around the edge of the pan and invert onto a plate.


Saturday, September 4, 2010

Rustic Peach and Mozzarella Galette

This weekend I made this deliciousness:


I was very pleased with how flaky and buttery the pastry turned out and felt like my old employer, Grand Central Bakery in Portland, Oregon (the King of Rustic Pastry) would have approved. Maybe I actually could have been a pastry chef rather than the retail/sandwichland maven/barista that I once was. I used David Lebovitz's dough recipe from his amazing French Tomato Tart and, as long as all my future pastry comes out so nicely, I think I'm sold. The main difference is that he scrambles an egg with the cold water. I even made it in the cuisinart and it turned out well.


The filling was inspired by a salad that James once threw together. I layered nutty parmesan with savory-sweet caramelized shallots, fresh peaches and fresh mozzarella, drizzled it with olive oil and some of E.'s honey, and sprinkled it with fresh thyme and basil.

Since E.'s honey was crystallized I had to melt it. I don't use microwaves and was so happy to use the adorable syrup warmer we recently bought. I just put it right on a low gas burner and in minutes it was ready to pour.

We shared this galette with friends at brunch and happily, it was a hit.

Rustic Peach and Mozzarella Galette

Pastry:

David Lebovitz's tomato tart dough recipe

Filling:

3 T grated parmesan
1 large shallot, sliced thin
3 T olive oil
4-5 peaches, peeled and sliced
1 ball fresh mozzarella, sliced
2 heaping T of fresh herbs, such as basil, thyme, chives, or rosemary
2 T honey
Salt and Pepper

1. Roll out dough and put on parchment paper-covered baking sheet.
2. Sprinkle with parmesan, reserving a generous 2 inches around the edge to allow for crust to be folded over.
3. Caramelize shallots in 1 T of olive oil and then sprinkle over cheese.
4. Starting in the middle, arrange peach slices in a single layer.
5. Top with slices of mozzarella.
6. Sprinkle with fresh herbs and salt and pepper.
7. Drizzle with remaining 2 T olive oil and 2 T honey.
8. Pick a point of the dough and fold it in. Continue folding every few inches, until you have worked your way back to the beginning.

Bake at 425 degrees for 30 minutes, checking half way to rotate.

Wednesday, August 18, 2010

Ciao Bella

San Marzanos are what tomato sauce aficionados go gaga for. The small plum variety is considered by many to make the best tomato sauce. It is fleshier than most tomatoes, has a deep, robust flavor, few seeds, and low acidity. In fact the San Marzano gave birth to tomato sauce as we know it. Grown in the region of Campania (also home to pizza and macaroni), San Marzanos are exported all over the world, but can be grown anywhere with rich soil and warm breezes. Happy Boy Farms' Mediterranean climate suits them well and the people buying rave about the sauce they're making.

the gorgeous city of Campania


Usually, when someone tells you that a San Marzano tomato makes the penultimate tomato sauce you probably buy a couple 28 oz cans and try it for yourself. But since Happy Boy is growing them and since he knows I'm always game to cook, James brought home a flat of San Marzano tomatoes this weekend.


It was truly a labor of love; I have no food mill.

As I am holding out for a cute one like this.


...and so, I peeled them all by hand.

While peeling them, I thought a lot about the factory workers in Italy who peel the tomatoes for canning. Surely someone, not a machine, must do this, right? It's a delicate, tedious task and a machine would surely destroy the fruit in the process. But someone must have figured out how to have a machine do the work by now. Even so, it most certainly was once a human task. I thought of James' Nonna who immigrated to San Francisco from Monfalcone, Italy around 1956 and got a job stuffing olives with pimentos. I don't know about doing it as a full-time job, but I actually enjoyed the work: the cold plunge in the ice bath, the intense heat of the tomato in my hand, the stripping of its skin, its silky denuded body in my hands, watching my pile of gems grow. Peeling a flat of tomatoes is a tedious but sensory-rich task and if you're feeling game I have a few words of advice:

1. You will need to boil the tomatoes to loosen the skins to peel. I did this in two batches, standing vigil at the pot with a neighboring colander and slotted spoon at the ready to scoop as they pop their skins. You'd be surprised how long it takes some of them to pop. The skins are their strongest defense and this is why I'm peeling them; curls of tough tomato skin are not a good texture in sauce. If you listen carefully, you can sometimes hear the release of a gentle puff of air as the tomato skin breaks at the surface.


2. Have a large bowl of ice water at your elbow. The tomatoes can be plunged in the ice water, but they shouldn't really soak in it. Not only will the ice water shock the stubbornest tomato into popping their jacket, but it will be there to rescue you when you burn your little paws on these piping hot fruits. Even after plunging into ice water they retain quite a bit of heat and you will need to cool your fingers a bit.


3. The best way I found to peel them is to grab the stem, where the plant holds onto its fruit the most tenaciously, and sort of squeeze the tomato out of its skin, pinching the stem to pull the skin off in one movement. The fruit should just slide out of its little jacket and into your bowl.


After peeling them all, I was left with this:

100 oz of whole peeled San Marzanos

Now to make the sauce!

I decided on two, a vegetarian one and a meat one.

They are exactly the same, except that one has four spicy Italian sausages (pre-cooked and drained of fat) added to the pot.

Basic San Marzano Tomato Sauce

6 T olive oil
1 large onion, chopped
4 cloves of garlic, sliced
1/2 medium carrot, finely shredded
56 oz whole, peeled San Marzano tomatoes (that's two 28 oz cans for those of you using cans)
1/4 C fresh basil, chiffonaded
Salt and Pepper to taste

1. Sweat the onions over med-high heat in olive oil until carmelized. This could take up to 15 minutes.
2. Add garlic and saute for two more minutes, until aromatic.
3. Add carrots and saute for another few minutes.
3a. If you are making a meat sauce add the cooked and drained crumbles now.
4. Add tomatoes that have been quickly pulsed with their juices in a cuisinart or put through a food mill.
5. Stir frequently at medium heat till slightly reduced.
6. Stir in basil, salt and pepper.

Meat Sauce

Vegetarian Sauce


My hard-won and delicious dinner.


Saturday, August 14, 2010

Es un Salsa...Muy Salsa


If you're familiar with this tag-line, Es un salsa...muy salsa, then you're probably familiar with Tapatio, that delicious hot sauce with the handsome man from Jalisco on the label.

Used to be that only this handsome man knew the secret of my own salsa recipe, which I unabashedly stole from James, the other handsome man in my life. But thanks to blogger, it is no longer a secret. I share with you the recipe for a salsa...a most amazing salsa:

Heirloom Tomato Salsa

4 C chopped heirloom tomatoes, about 5-6 med-large tomatoes
1/4 C minced red onion
1/2 C chopped cilantro
1/2-1 jalapeno (depending on how spicy you like it with or without seeds), minced
juice of one lime
a couple splashes of Tapatio
a couple splashes of apple cider vinegar
salt and pepper to taste


Combine in a large bowl...
and serve!


Tuesday, August 10, 2010

Panzanella


Happy Boy Heirloom Tomatoes, arguably the best product they have all year, are rolling in stem over blossom scar at a rate that I have a difficult time keeping up with! I'm talking Brandywine, Red, Pink, Yellow,
and Black Brandywine, Cherokee Purple, Green Zebra, Paul Robeson, and Early Girls!

As a kid I hated tomatoes, probably because all we ever ate were the sad tasteless globes the tomato-growing industry delivered year-round to the local Food Lion. Back then I never could have told you that tomatoes have a definitive season. Now I don't even bother buying tomatoes out of season. I don't see the point. I would rather wait till summer to have that BLT than waste my money and support an industry that picks tomatoes rock-hard and green, then treats them with ethylene gas (the plant's natural ripening agent) to soften and redden them for delivery. This is to say nothing of what growing tomatoes in a monoculture has done for the environment or human rights and health.

You've probably guessed by now that the next few posts will be about tomatoes, as the glut on my counter begs to be put to good use.


Panzanella, or bread salad, is one of my favorite things to do with summertime tomatoes. If you've never heard of it, you may be thinking
Bread? Salad? I thought they were mutually exclusive? And in most countries you'd be right, but Panzanella is Italian and the Italians are masters of incorporating bread, especially stale bread, into all sorts of things including salad. Usually these dishes have the word paisano, or peasant, in there somewhere.

The main ingredients are
bread (good bread if you have it and on the stale side, but not like crouton hard or break your teeth on that green tomato hard. I used Tartine's bread which is maybe the best bread I've ever had.) and tomatoes (delicious, ripe, and in season, puh-lease). For obvious reasons I made mine heavy on the tomato and, if you like, you can add cubed red and yellow peppers.


A note of worth: panzanella is best at its freshest, so plan/reduce recipe as you see fit and unless cold soggy bread is your thing, I don't recommend keeping this for leftovers. Unless--UNLESS--you warm it in a saute pan for breakfast and serve it with a poached or fried egg on top. I call it Italian Peasant Breakfast and it's friggin' gooooood.

Panzanella

3 T olive oil
6 C cubed crusty/french bread
1 tsp salt
3 large tomatoes, cubed
1 cucumber, cut in 1/2" slice
1/2 red onion, sauteed in olive oil
20 basil leaves, cut into a chiffonnade
3 T capers, optional

1. Heat olive oil in a large saute pan and then add cubed bread and salt and stir/toss to coat in oil. Brown till golden on med-high heat. Remove to a large bowl.

2. Saute onion in leftover pan oil till softened and then add to bread.

3. Add everything else to the bowl, including the following vinaigrette and toss to coat. If you can resist eating it all then, let the panzanella sit for about 10 minutes, allowing the flavors to marry and the bread to get the perfect amount of moist before digging in.

Vinaigrette:

1 tsp minced garlic
1/2 tsp dijon
3 T champagne vinegar
1/2 C olive oil
1/2 tsp salt
1/4 tsp pepper

1. Add everything to a jar with a well-sealing lid and then shake it till emulsified. This vinaigrette is delicious on green salad as well, so why not make extra?